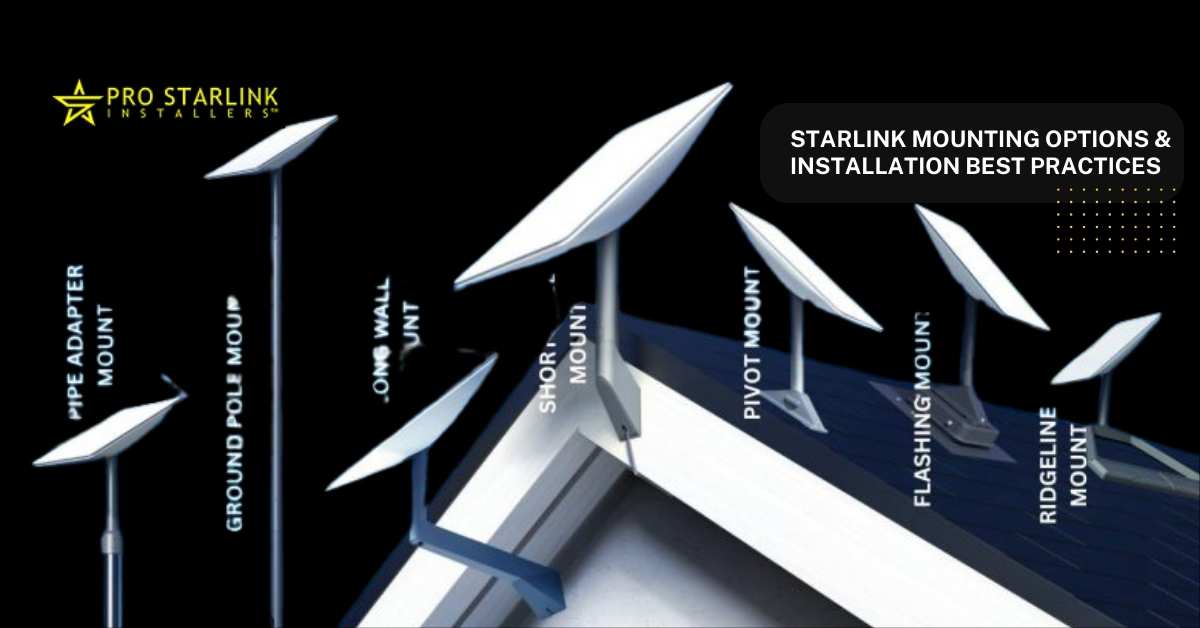
Starlink Mounting Options & Installation Best Practices
Common Starlink mounts, mounting & Starlink installation best practices to glean insight to help select the best option for your property.
As Starlink continues to make revolutionary changes in internet access, proper installation is a key factor in achieving its best performance. Although Starlink’s satellite dish is designed to align automatically to capture the best possible signal, obstacles such as trees, buildings, or terrain could interfere. This is where the right mount comes into play.
This article will tackle the standard Starlink mounting options, their features, and the best installation practices to help you choose the best one for your property. Let’s get started!
Why Starlink Dish Mounting Matters for Starlink
Poorly positioned Starlink dishes result in signal drops, slower speeds, and overall inconsistency in connectivity. Starlink needs an unobstructed view of the sky for a strong connection. Trees, buildings, and other things obstruct the signal. Choose the right mount is essential for several reasons:
A properly mounted dish in a clear, open area helps Starlink maintain a consistent link to satellites which is the key to a fast and reliable internet connection.
Selecting the right mount improves the stability of the dish during harsh weather such as high winds, snow and rain, preventing the dish from shifting or becoming misaligned.
A well-installed mount provides better and easier cable management, keeping them organized and avoiding wear and tear and connection issues.
Investing in a high-quality mount will ensure that the Starlink dish remains securely in place withstanding environmental factors, stays functional and minimizes the need for maintenance/adjustment.
Starlink Dish Installation: Mounting Options and Solutions
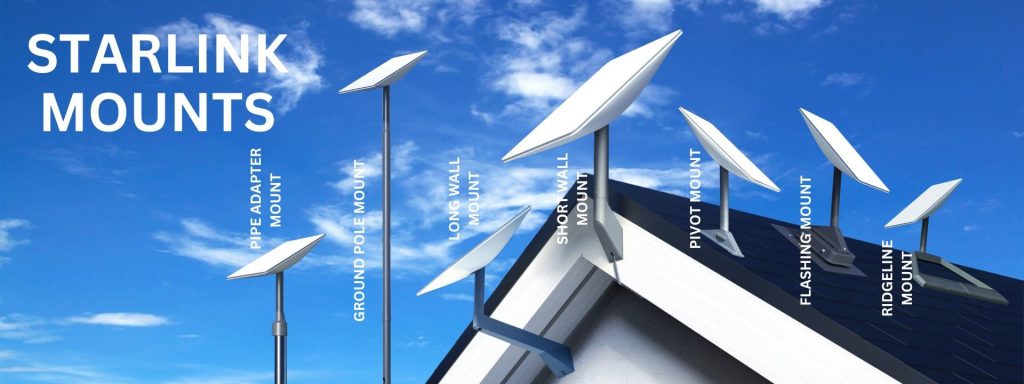
Different Starlink mounts cater various installation environments, property specifications, roof types, and specific user needs. The Starlink dish can be mounted on the roof, a pole, a wall, or a ground stand. Each type of mount is designed to provide a specific solution that fits unique conditions and needs.
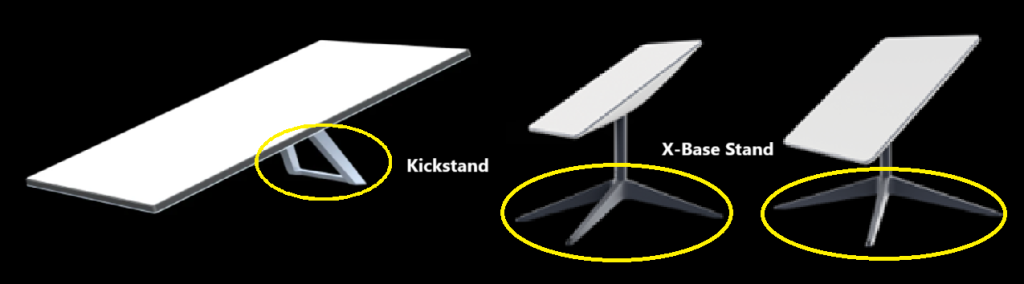
1. Ground-Level Installation
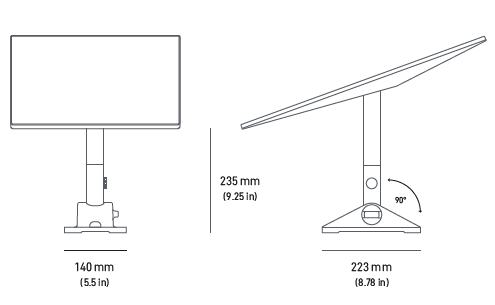
The base included with the Starlink kit is designed for ground-level installation or a quick setup, allowing you to easily test your internet connectivity before committing to a permanent installation.
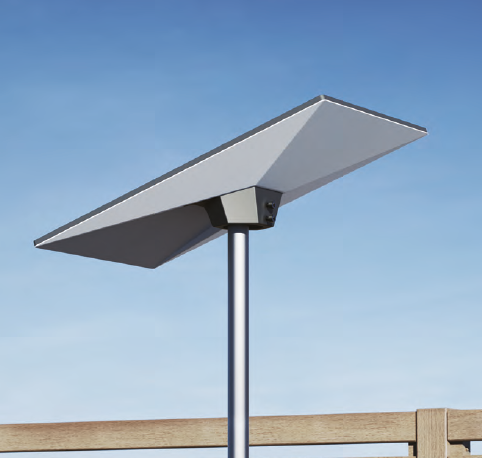
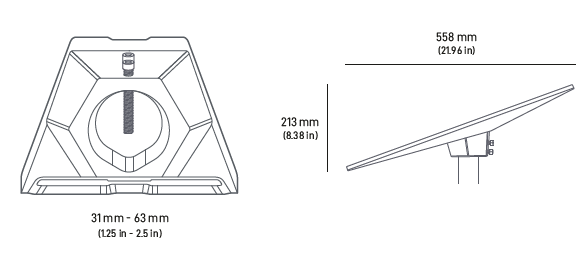
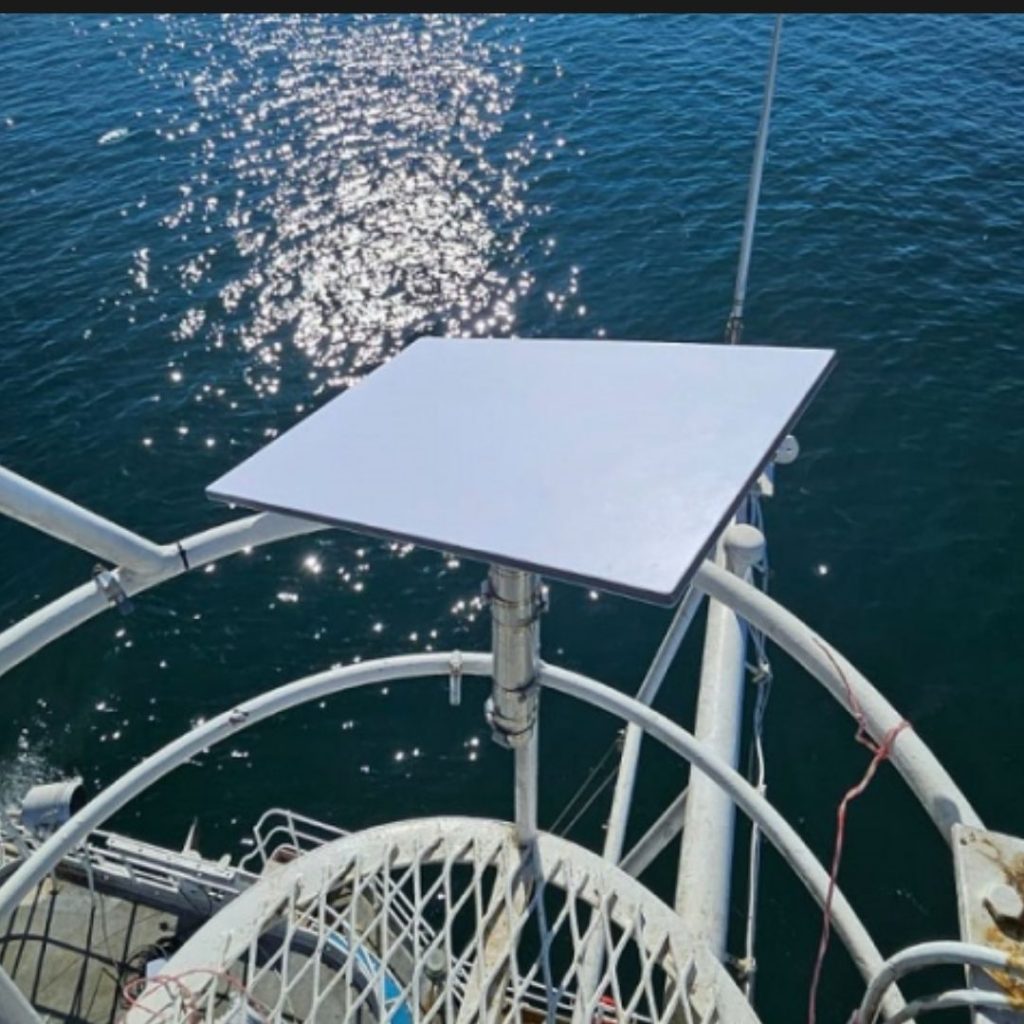
Pipe Adapter Mount – Engineered to fit poles with a minimum diameter of 31 mm (1.25 in) and a maximum diameter of 63.5 mm (2.5 in), its adaptability makes it easy to position your Starlink dish for optimal performance on a wide range of pole sizes.
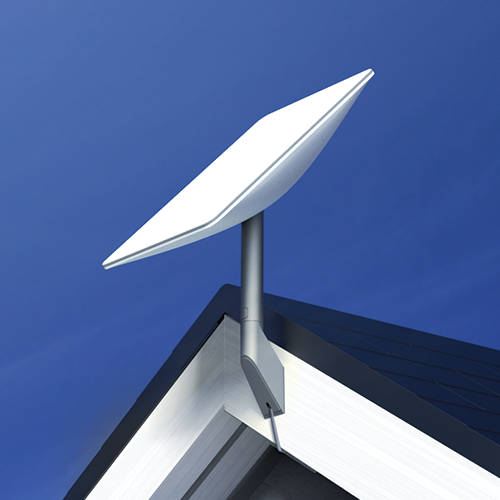
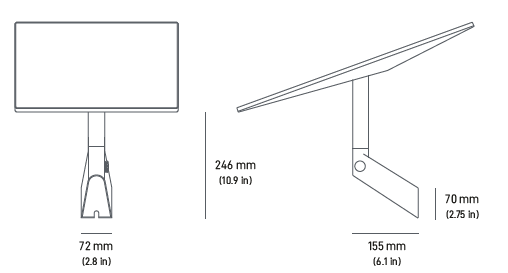
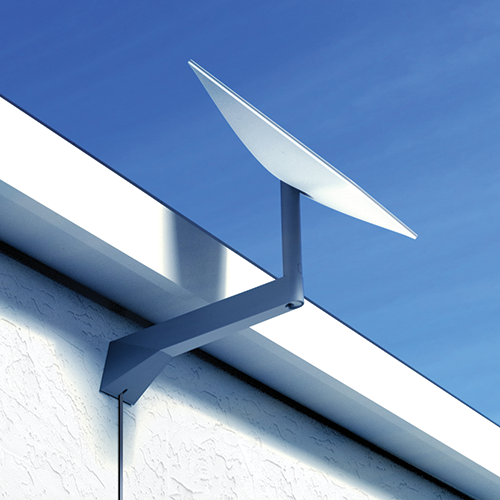
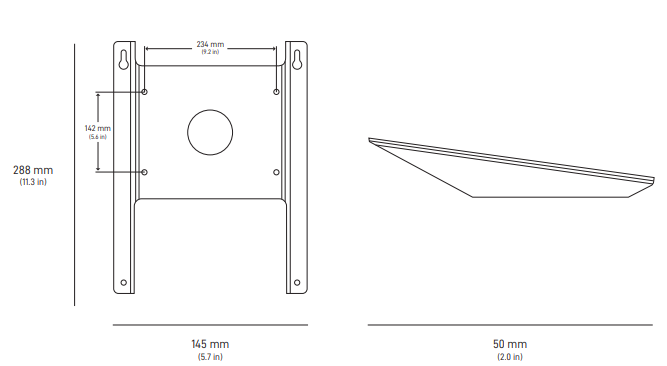
Standard Wall Mount (Short Wall Mount)- Ideal for shallow roof overhangs or exterior walls near the top of the gable or fascia, this wall mount allows clearance of overhangs up to 2” and accommodates a maximum 4” overhang. It provides a secure, extended platform that ensures optimal positioning of your Starlink, maximizing connectivity and performance.
Kit Includes: A short wall mount, screw kit, carry bag, screw cover, silicone, cable clips, and installation instructions.
Long Wall Mount – Best for long roof overhangs that could interfere with signal reception, the long wall mount allows you to install the dish further out and clear of obstructions. Allows for clearance of overhangs of up to 12″
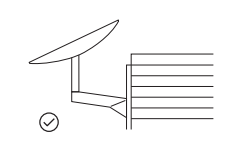
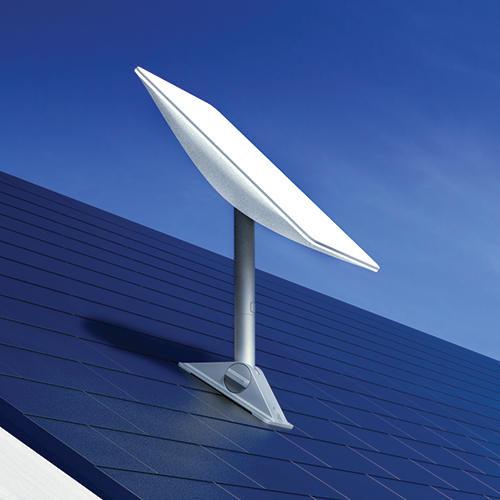
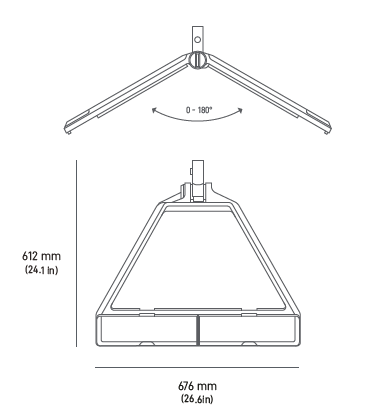
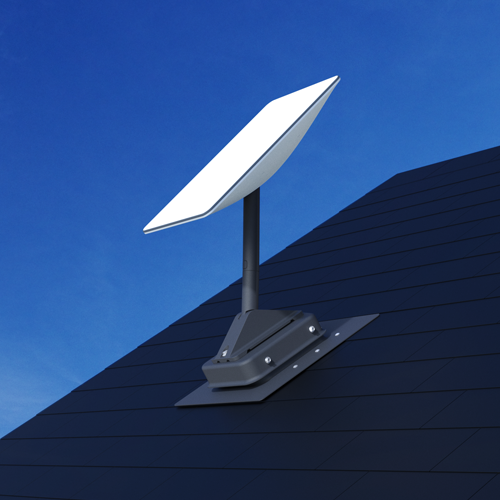
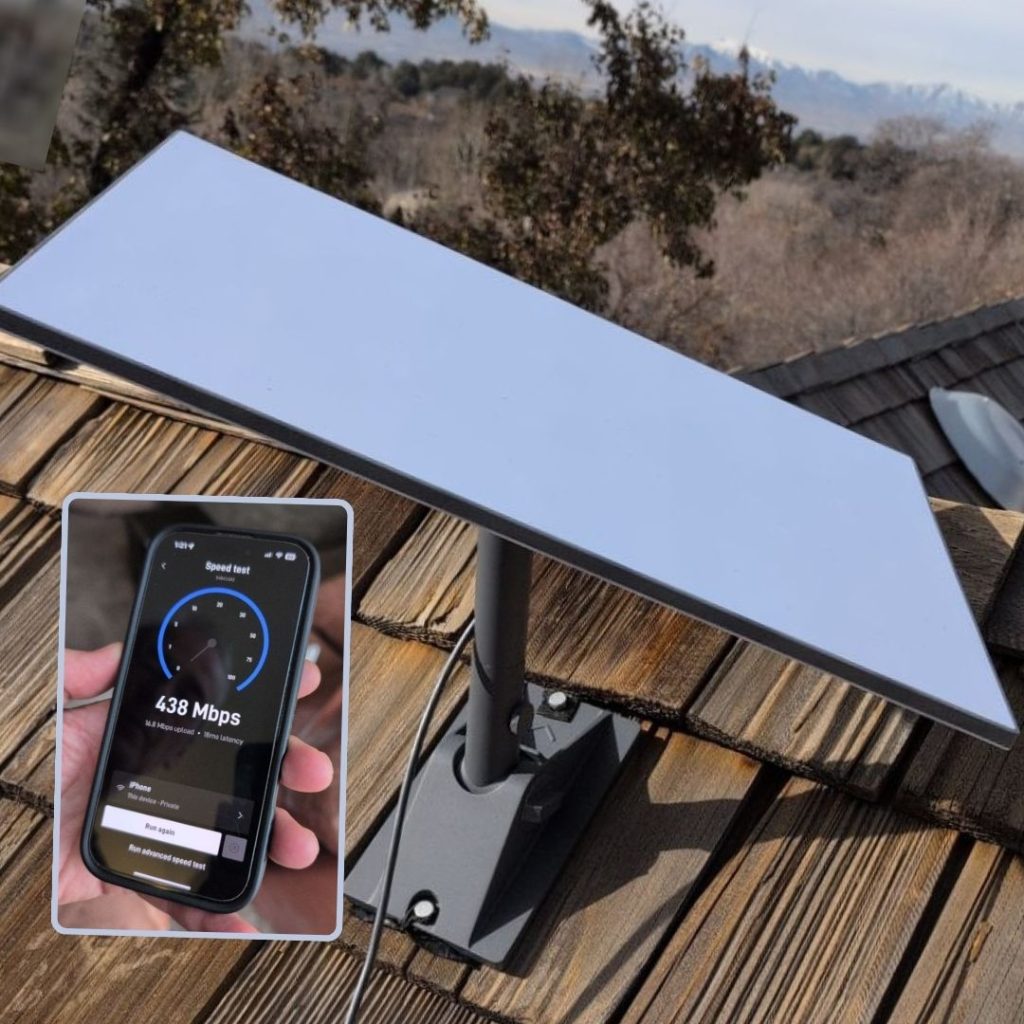
Pivot Mount -Ideal for installation on a slanted, shingled roof. It has a swiveling mechanism that allows for smooth adjustments, enabling precise fine-tuning to different angles and directions, ensuring optimal Starlink performance.
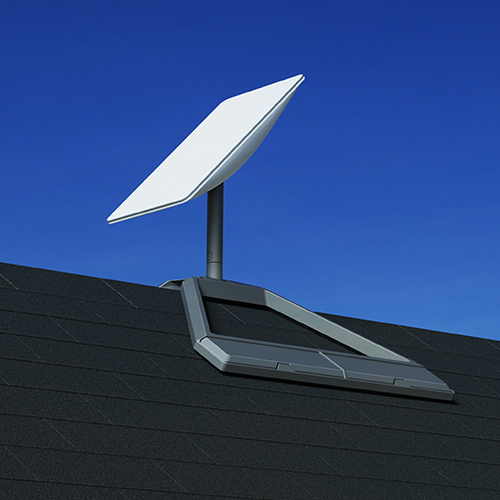
Ridgeline Mount – Designed for most rooftops (roof ridgelines) and any flat surface, no drilling is required. Ballast weight is included with the order and shipped separately.
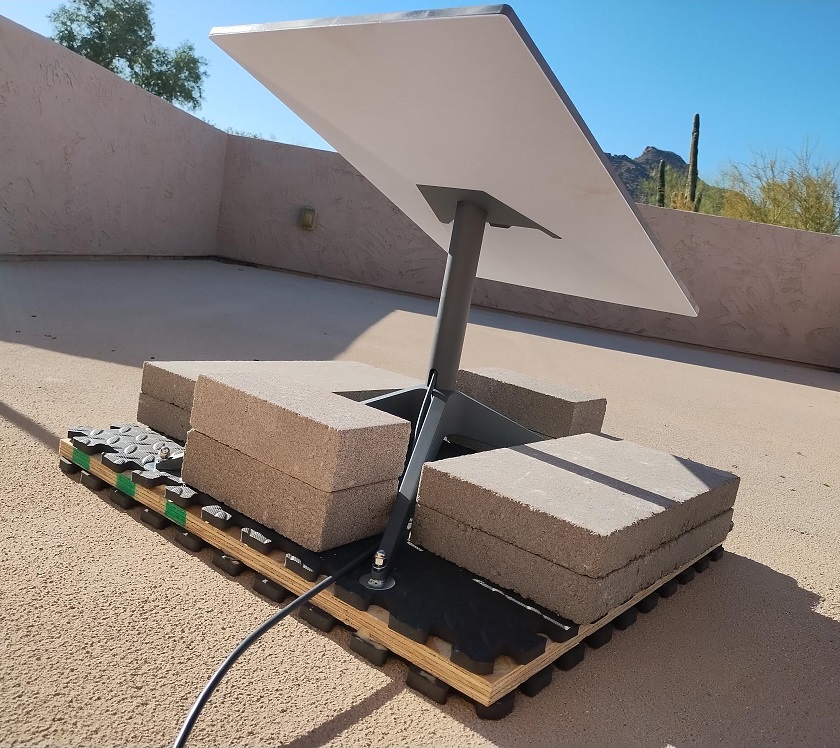
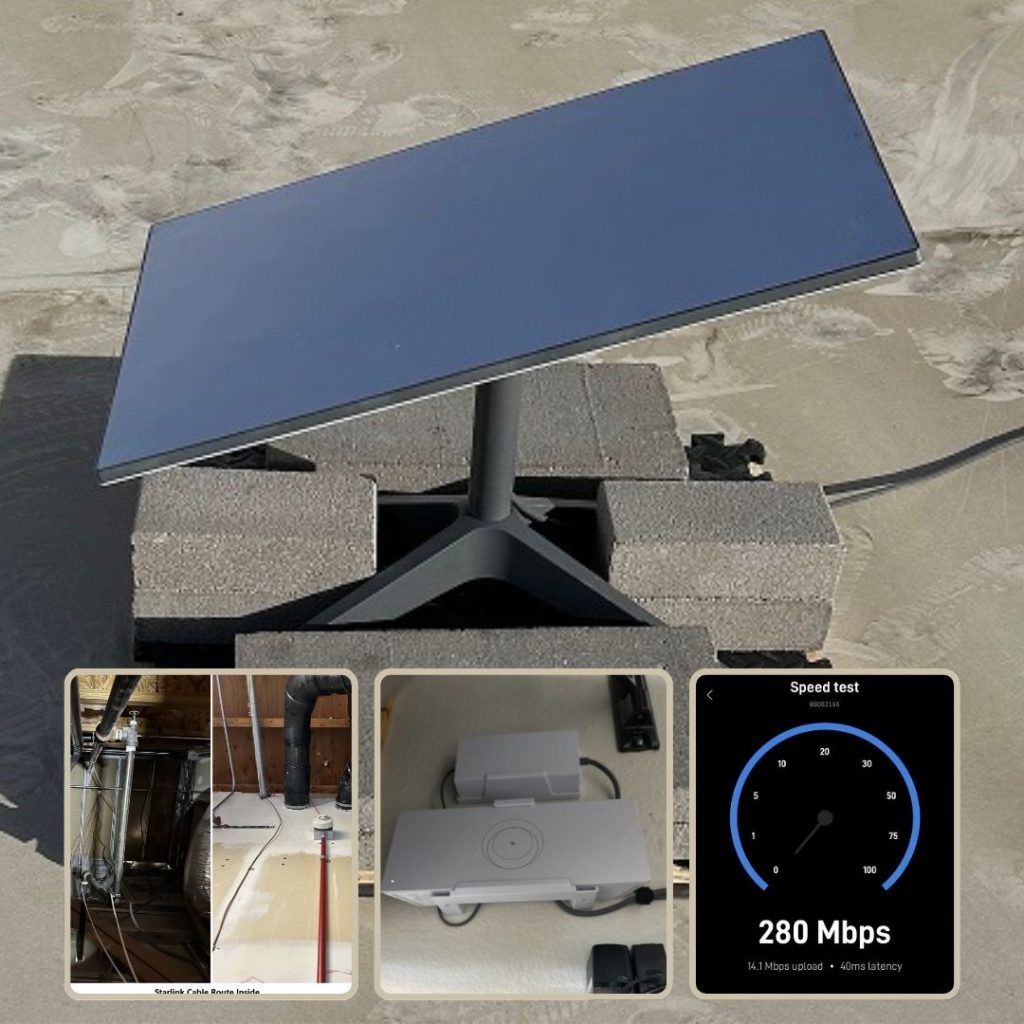
Non-Penetrating Roof Mount – Provides a secure, roof-friendly solution for Starlink dish installation without roof penetration or drilling. Designed for flat surfaces or roofings, it uses weighted blocks (like cinder blocks) for stability, protecting the roof from leaks or damage. This versatile mount ensures reliable satellite performance and suits both residential and commercial rooftops.
Flashing Mount – Additional purchase of the Pivot Mount is required. This accessory is specifically designed to offer water-tight protection for Starlink installations on both shingles and metal roofs, while also providing convenient storage for excess cable.
Standard to Standard Actuated Adapter – This adapter fits existing Standard Actuated Kit mounts, avoiding replacement. Ideal for customers upgrading or replacing with the newer Standard Kit. Compatible with Starlink Standard Actuated Mounts: short wall mount, long wall mount, pivot mount, ground pole mount, and ridgeline mount.
Kit Includes: Pipe Adapter Mount, Mast Tube, Allen Key
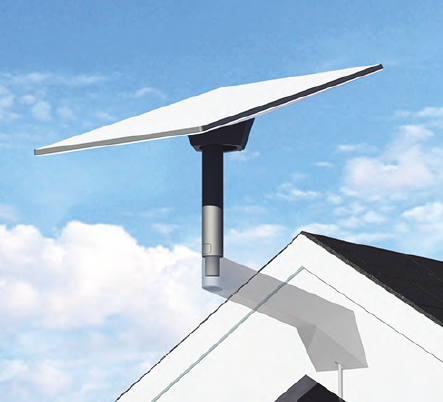
3. Other Mounts for Vehicles and On-The-Go
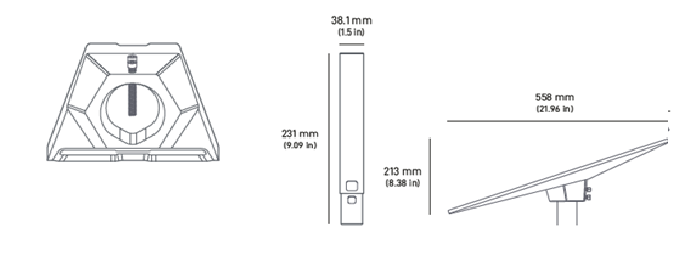
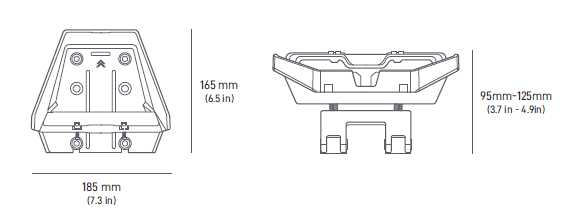
Standard Roof Rack – Securely attaches to vehicle roof racks of varying thickness (15 mm to 44.5 mm / 0.59 into 1.75 in) and widths up to 95 mm (3.74 in), or those with compatible T-slots. Enjoy connectivity on the go and effortlessly detach when not in use. Compatible with Starlink Standard and Starlink Enterprise.
Kit Contents: Roof Rack Mount Base, Grip Pad, 4x M8, Flanged Head Screws, Allen Key, Screwdriver
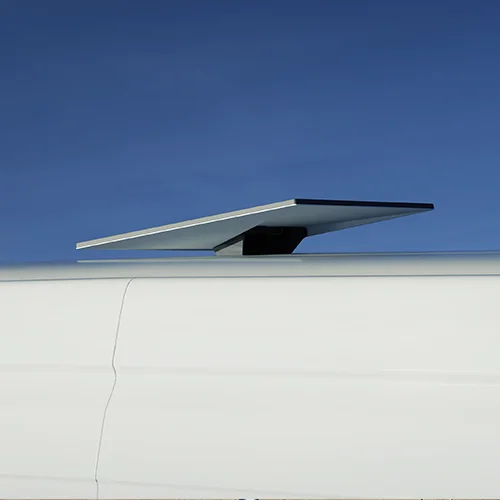
Standard Mobility Mount – It is engineered to create a watertight seal, preventing water ingress when permanently mounted to surfaces like wood, fiberglass, metal, plastic, and slotted rails on vehicle racks. It offers an 8-degree angle, ensuring reliable signal performance even in extreme or wet weather conditions.
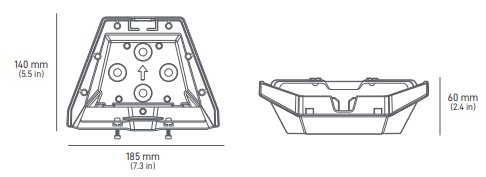
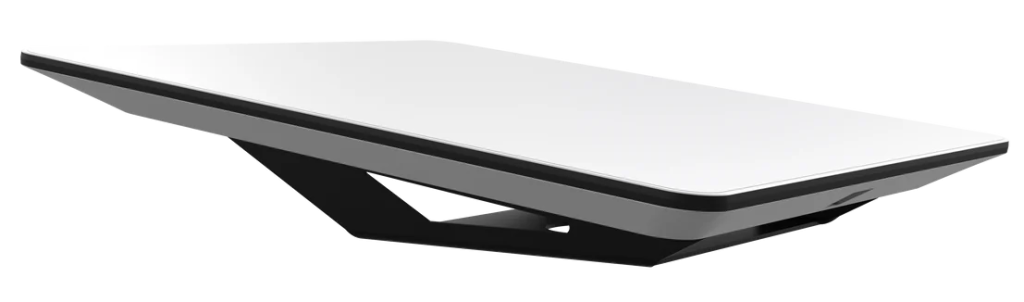
Wedge Mount-It comes from Starlink Flat High-Performance Kit suitable for installing on RVs and other vehicles.
Kit Contents: Wedge mount, screws, bolts, washers, nuts and sealant.
Starlink Installation Best Practices
Choosing the best installation location:
Avoid installing on balconies or windowsills.
Keep away from walls.
Do not place under covered outdoor areas.
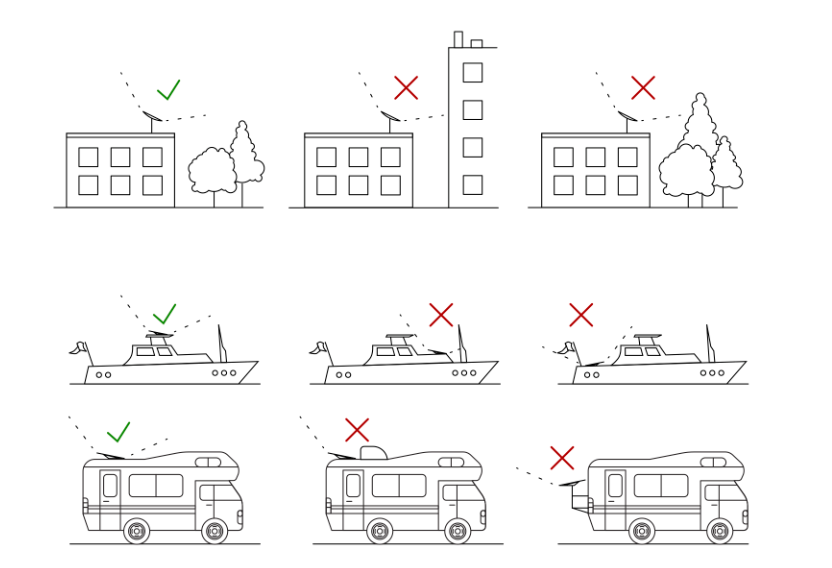
Check for obstructions beyond your property, such as tall trees in a neighbor’s yard.
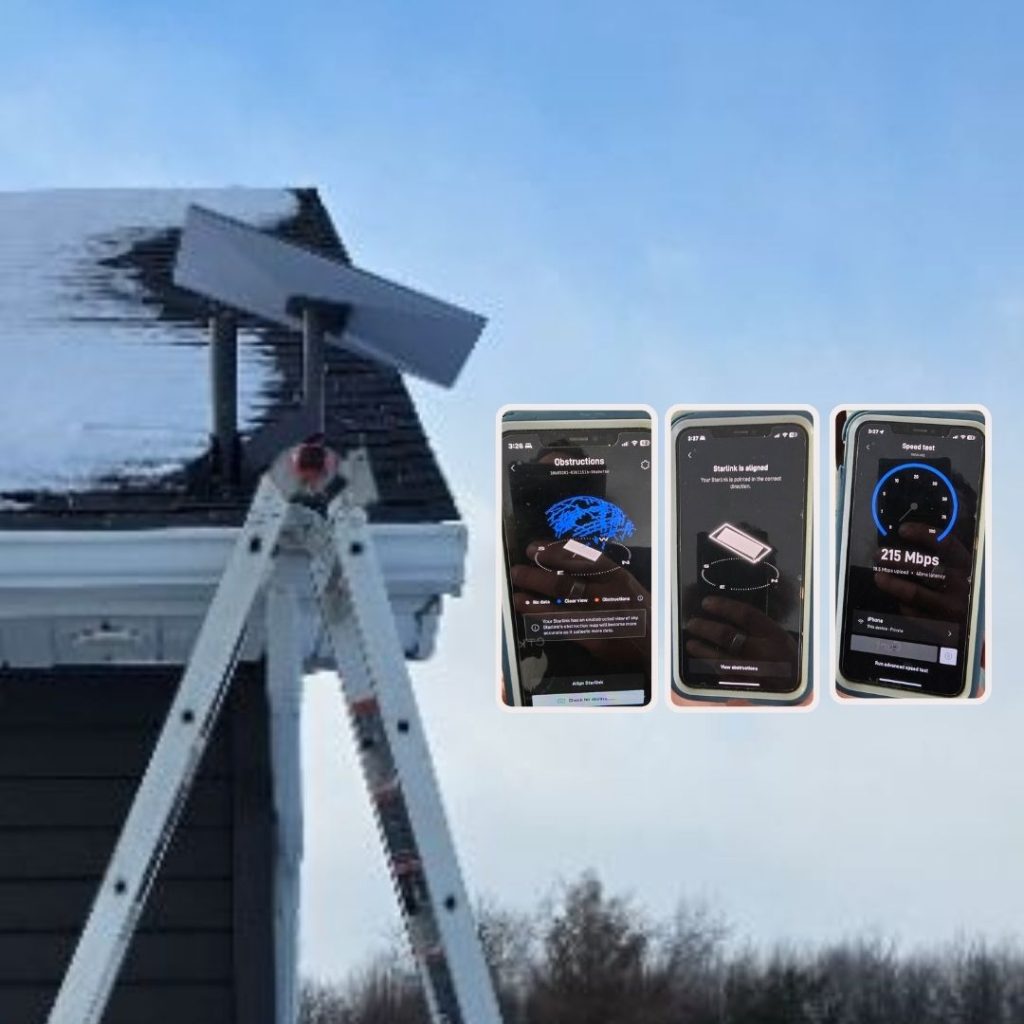
For better clearance, consider an elevated installation on a pedestal, post, or rooftop.
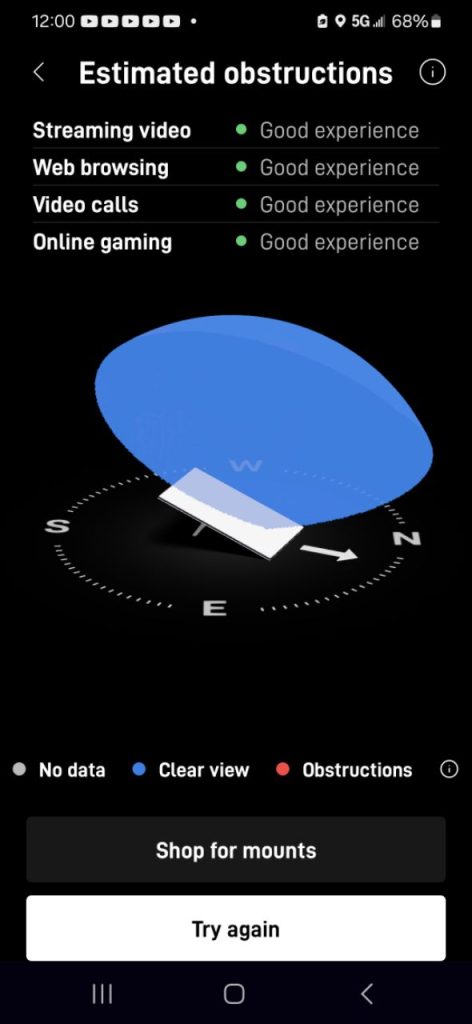
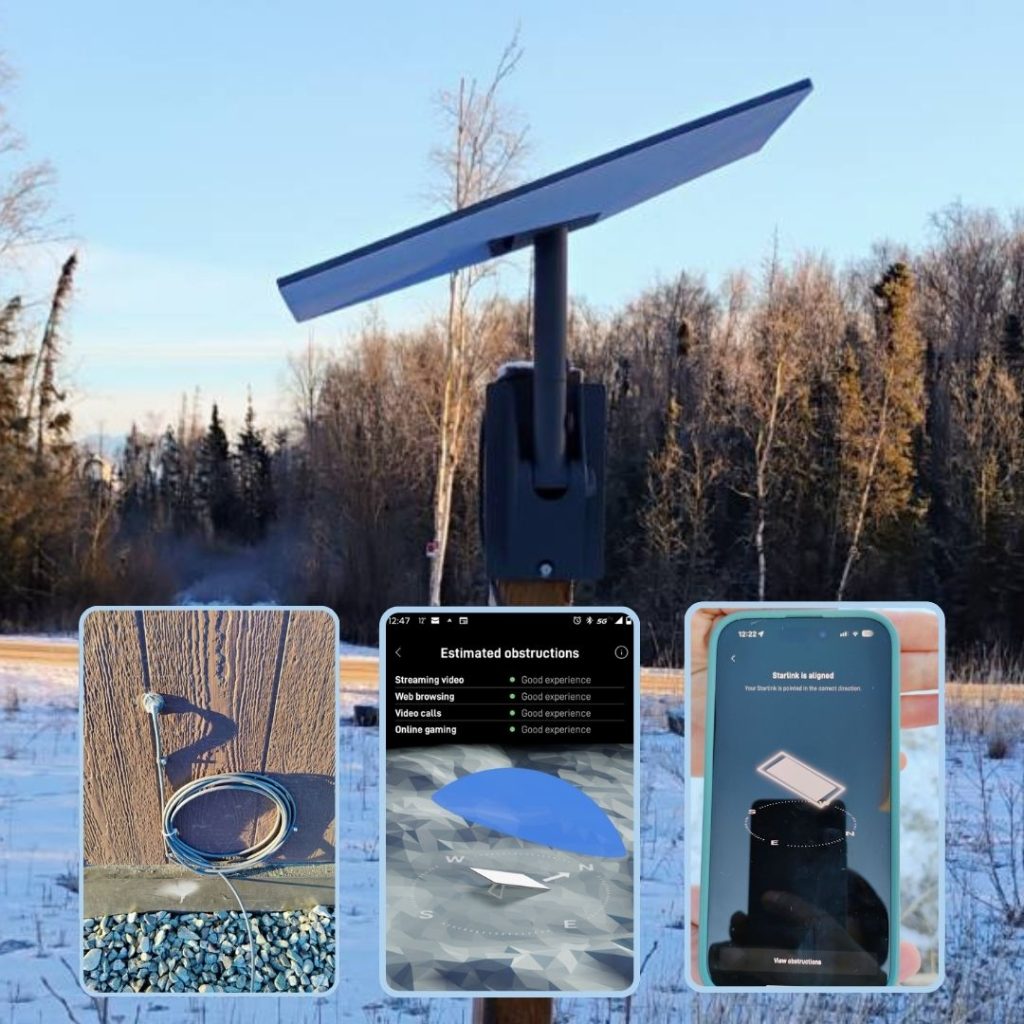
Use the Starlink App: Before you start, use the Starlink app to check for obstructions and identify the area that has a clear line of sight.
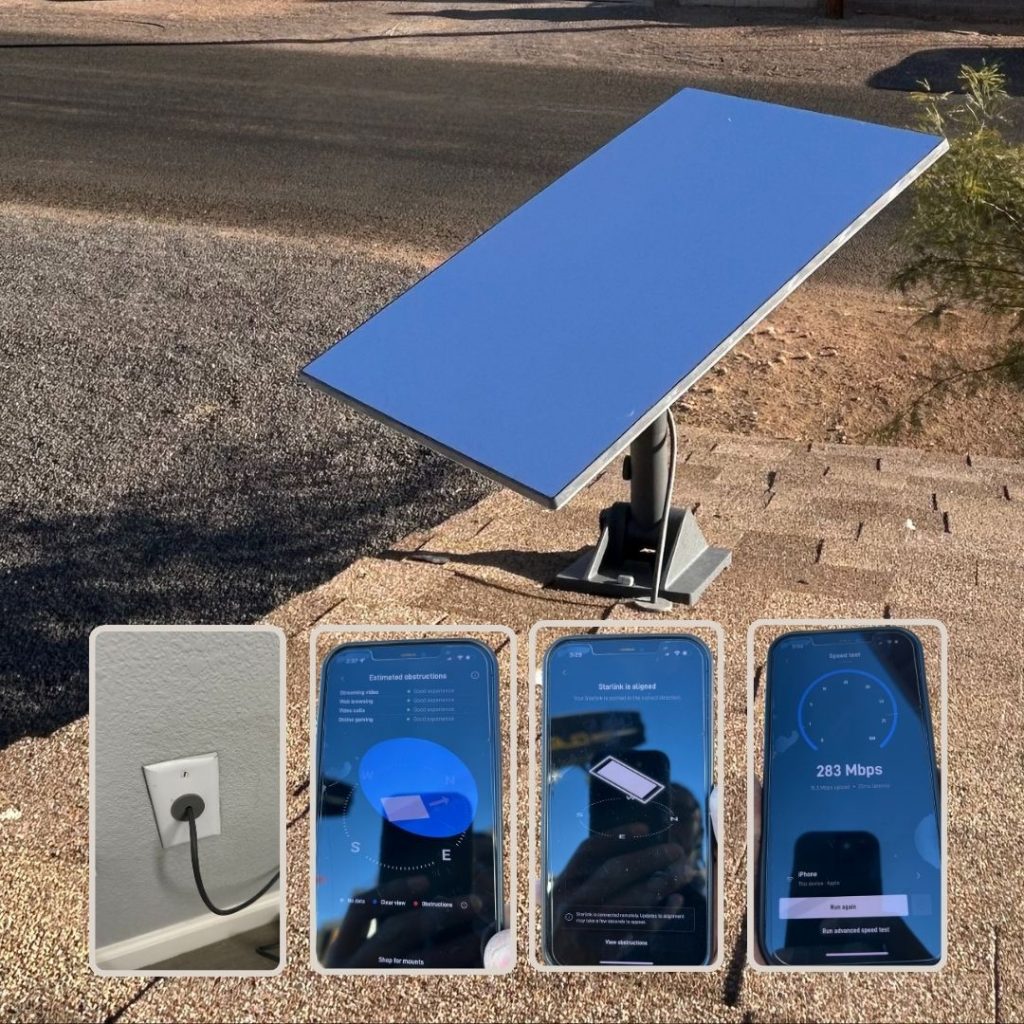
Quick Start Setup: Perform a fast setup with your Starlink on the ground first to confirm functionality and determine the correct tilt direction before making the installation permanent.
Avoid Cable Damage: Your Starlink includes a 50 ft custom cable. Handle it carefully:
Do not bend, twist, or force the cable through tight spaces.
Avoid dragging or bumping the cable ends during routing.
Don’t pull the cable too tightly during installation.
Keep connectors and cable ends dry—don’t leave components exposed to rain until everything is fully connected.
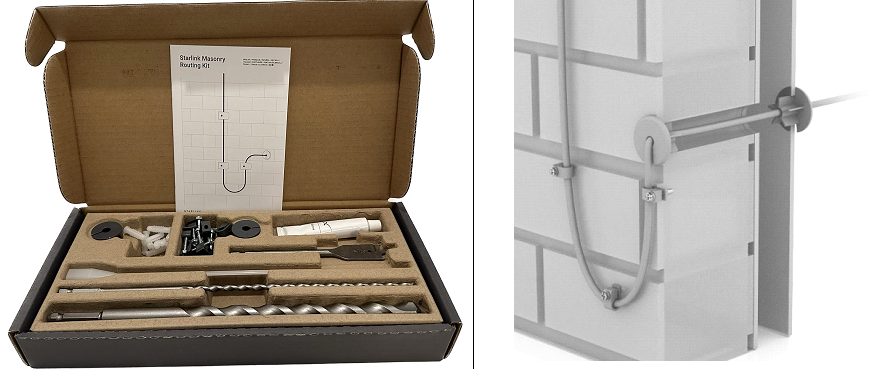
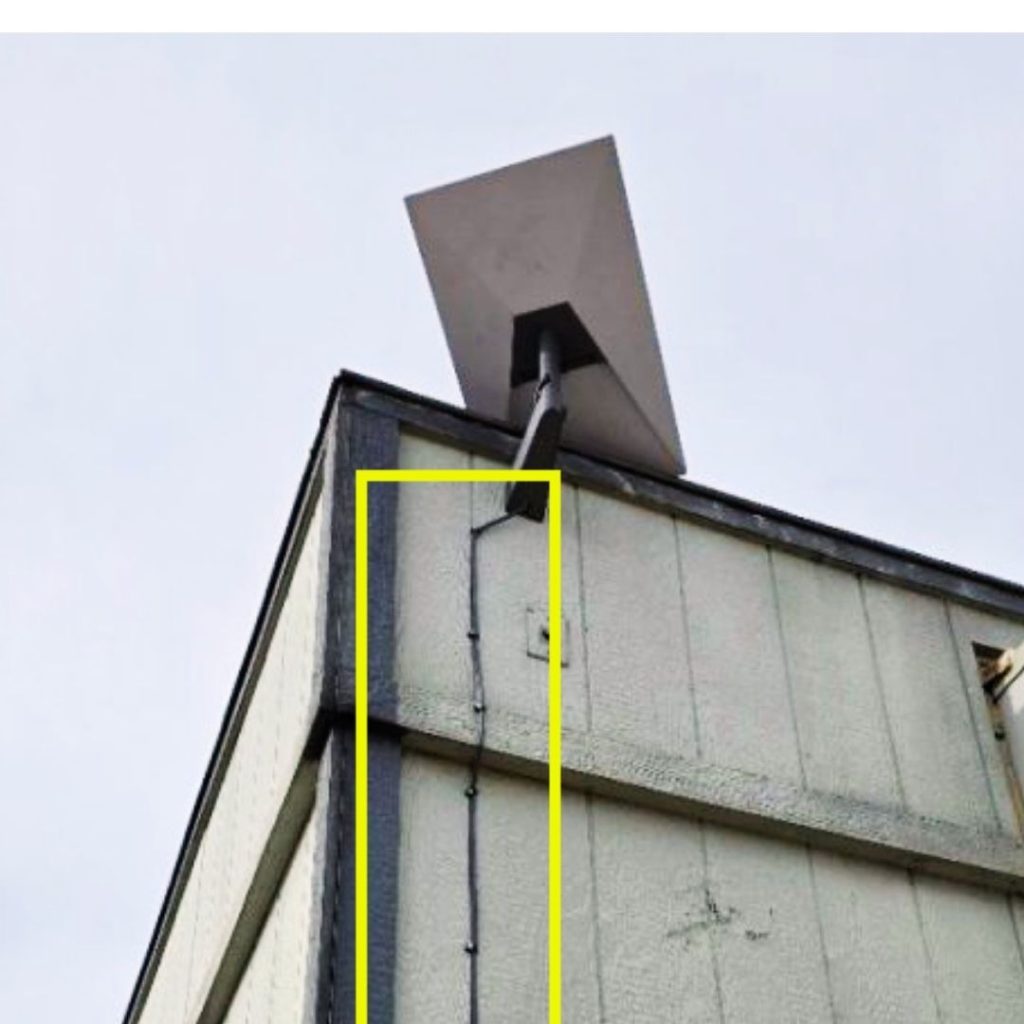
Cable Routing Kit: A protective cable routing kit is available in the Starlink shop to safeguard your cable during installation.
Starlink Masonry Routing Kit, with cable drip loop example
Install Vertically: For optimal performance, install Starlink as close to vertically as possible (e.g., avoid mounting horizontally on the side of a wall unless using the appropriate mount).
Flat Surface Installation: If possible, install Starlink on a flat, horizontal surface. It performs best when the mast is within 35 degrees of vertical.
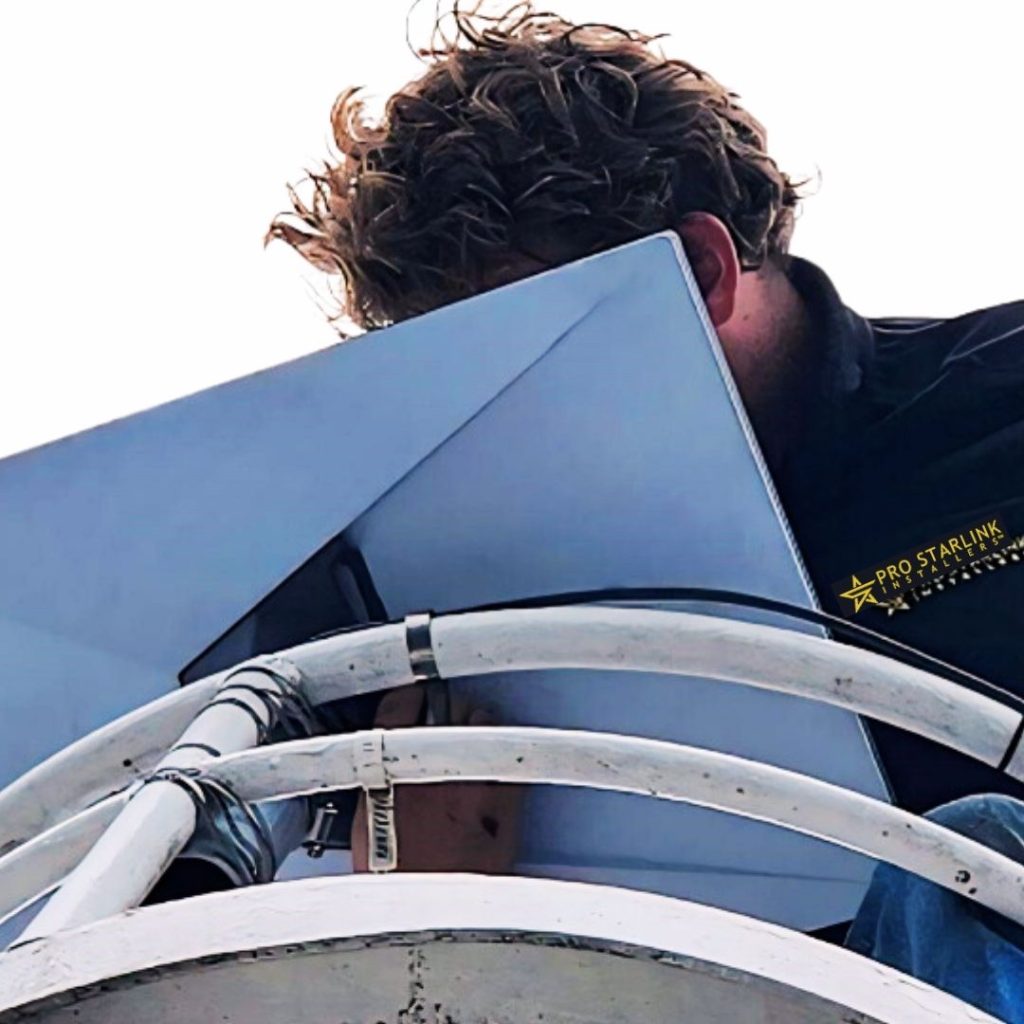
Unlocking Starlink Internet: Expert Installation by Pro Starlink Installers (now ProSat Networks, updated Q2-2025)
Proper installation is essential to unlock the full capabilities of Starlink, transforming your internet experience into one that’s fast, reliable, and efficient. Pro Starlink Installers offers expert Starlink installation services, ensuring that your Starlink system is installed with the right mount equipment and strategically placed for optimal performance.
See our recently tackled Starlink Installations or residential homes, businesses, maritime ships and more.
By choosing Pro Starlink Installers, you’re not just setting up a satellite dish—you’re investing in the future of internet connectivity, backed by skilled technicians who ensure your system performs at its peak.
CALL US TODAYAT1-888-973-9855 SPEAK TO OUR STARLINK INSTALLATION PROFESSIONAL SMEs FOR A COMPLIMENTARY CONSULTATION.
We offer a wide array of Onsite IT Support Services: – Commercial Grade Wireless Network Installation – TV Mounting Services – Installing Security Camera Systems – Cat5, Cat6 & Fiber Optic Cable Installation – Data Cabling Testing Services – Starlink Installation Services – Onsite IT Support Services – Starlink Maritime Installation – Marine Camera Installation – Starlink Military Discount for Veterans Do you need a website? And more—just ask!
[…] dish positioning is essential for maintaining consistent Starlink speeds. The dish should be mounted in an open, elevated location, such as a rooftop or a pole, and it must be free from any […]
[…] This critical evaluation allowed us to determine the necessary materials, equipment, suitable mount, and manpower to ensure a seamless and efficient […]
[…] installation. Based on this evaluation, we could determine the required materials, equipment, ideal mounting solutions, and manpower to ensure a hassle-free and efficient […]
[…] could affect connectivity. From this evaluation, we established the necessary materials, equipment, mounting solutions, and manpower needed to ensure a smooth and efficient installation […]